I can make them pretty fast now, I bought top notch stepper drivers and servos for it. It’s so much quieter than the previous one. I’m learning that it makes no sense to buy cheap hardware when you’re not doing volume. The few bucks saved will be paid for many times over in wasted time. I took pictures for documentation but I’m not sure if I’ll have the time to sink into it.

A lot of refinements went into this one, from the thousands of hours that the previous model was in use.
This was the very first model, built long before I got into tabletop plotters:
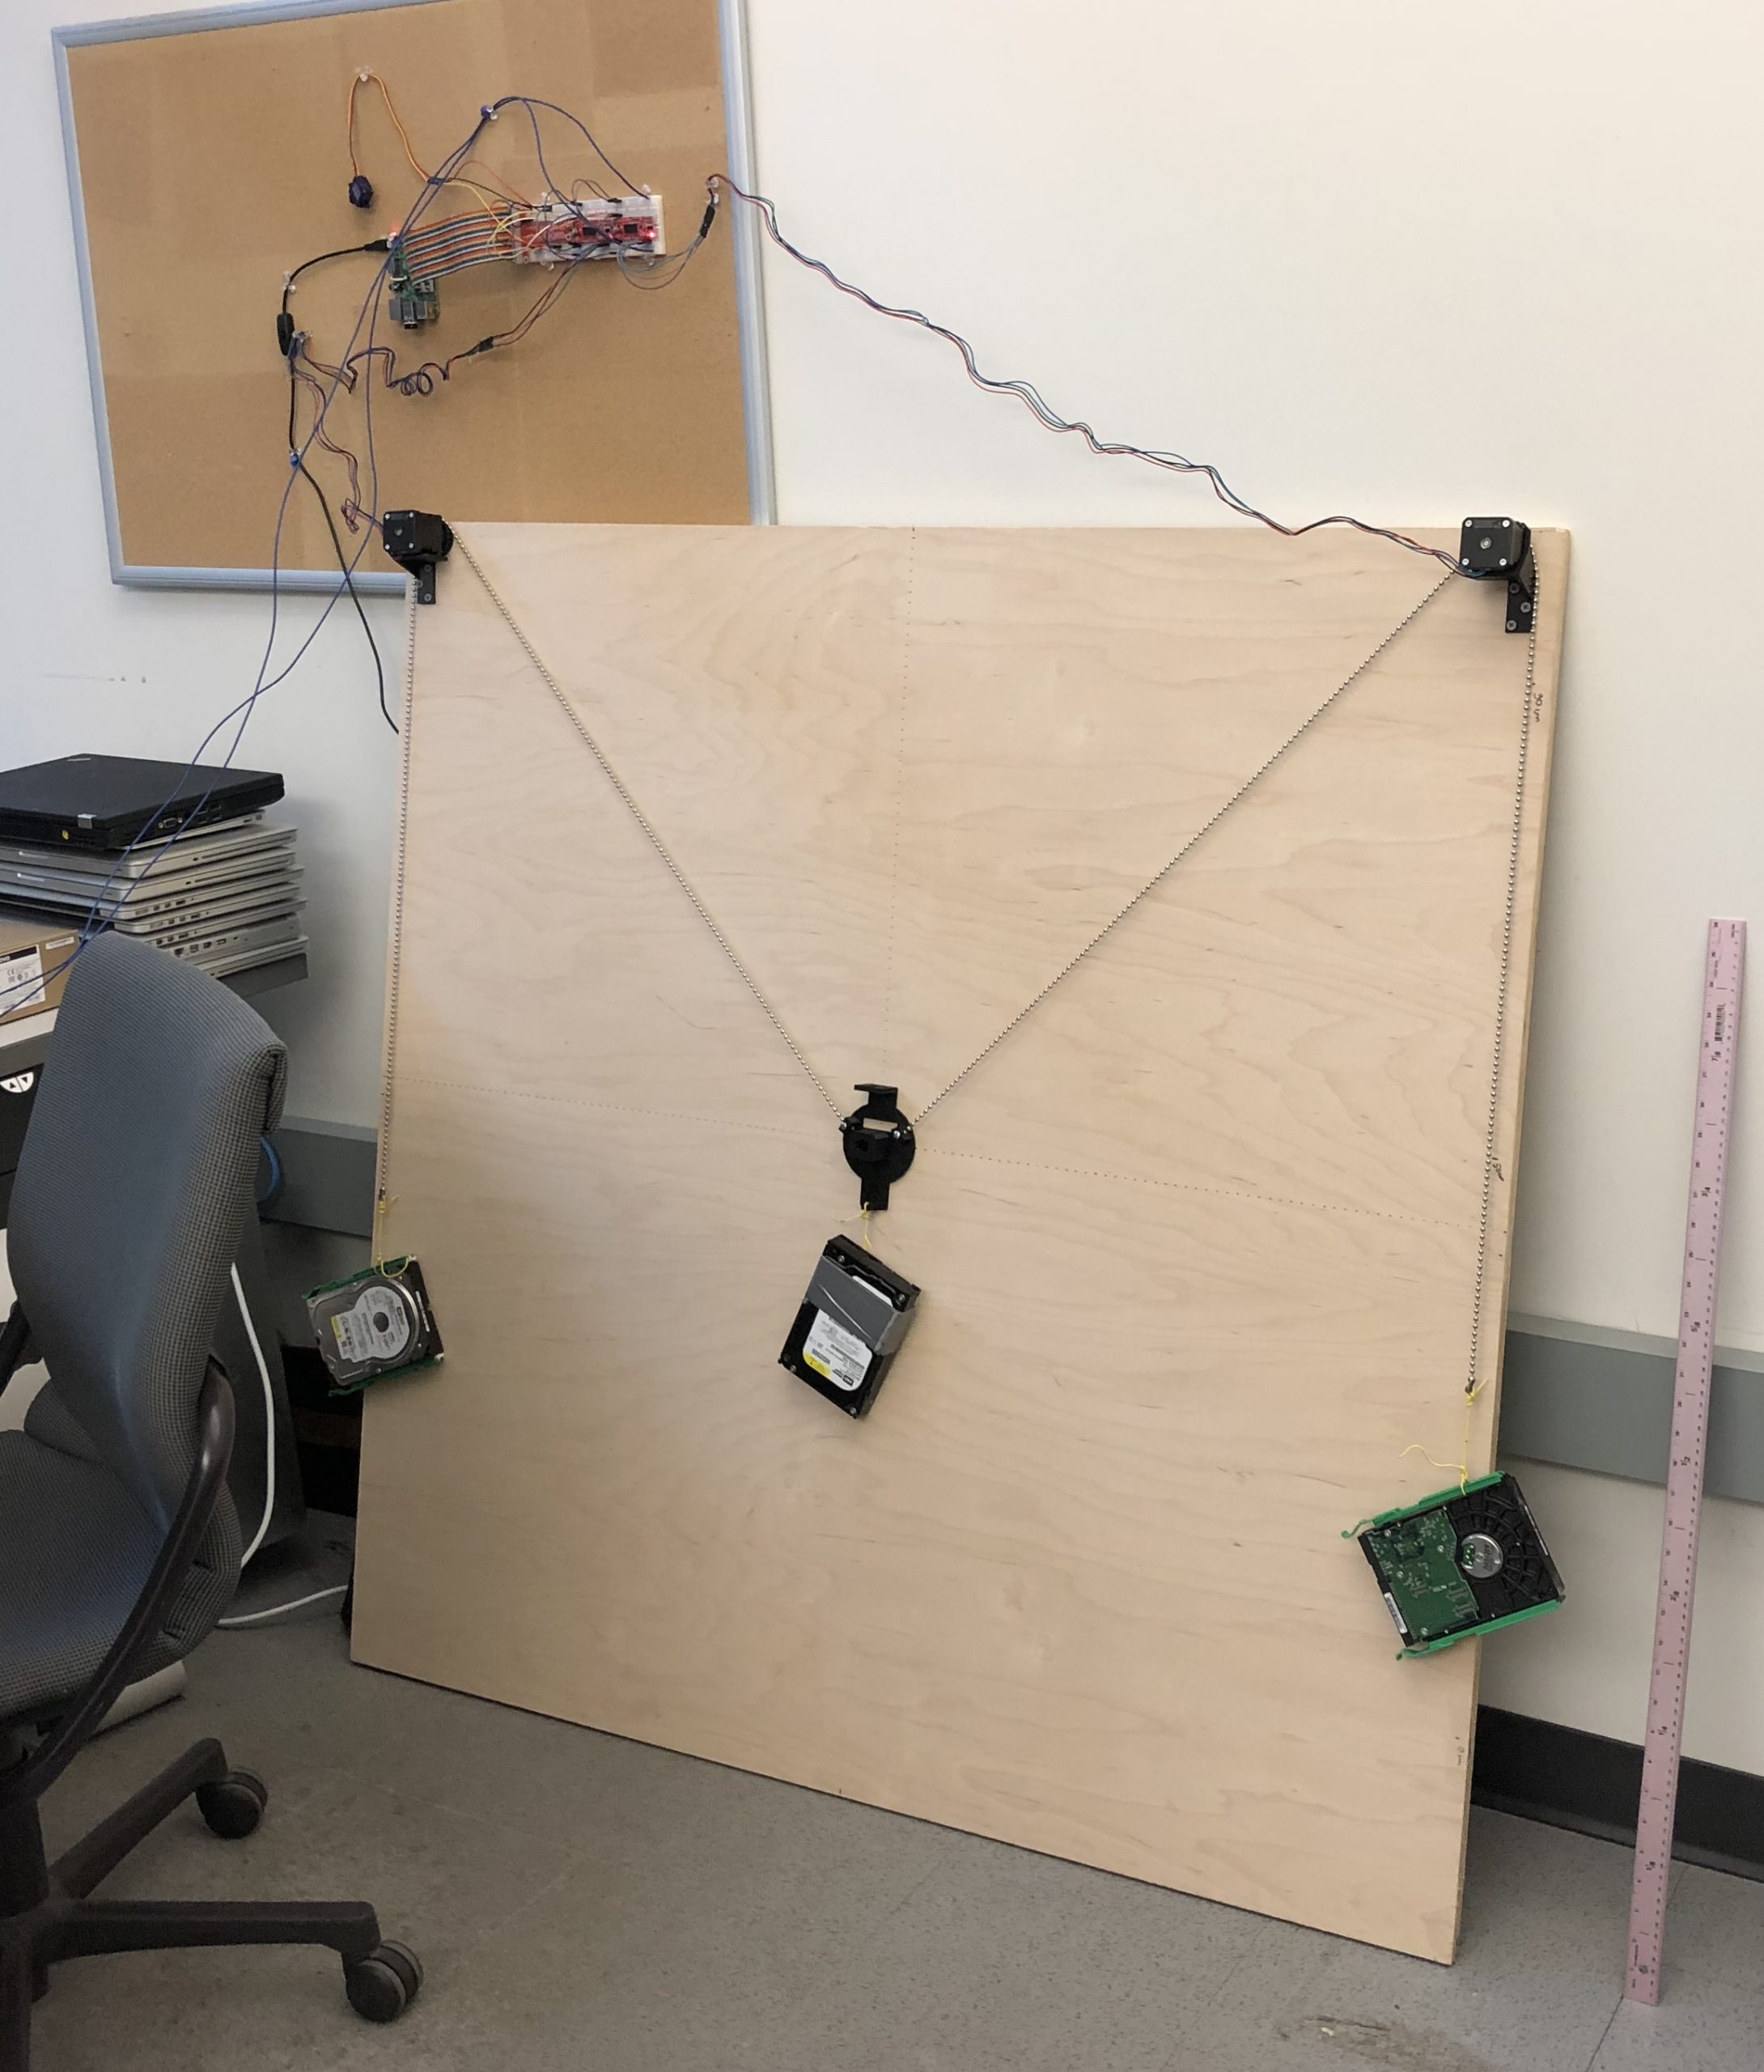
It’s pretty pathetic to look at 🙂 but it was a good stepping stone. I built another other one for teaching based on cheap 28BYJ-48 steppers. All this to say Gondola PlottyBot v2 is very much the result of a journey.
I have been putting off making my own! Even if you don’t get around to publishing the documentation on the build, I would to see the part list so I can take start heading in a good direction! New to the electronics/coding side of things, but know the fab side of things!
Hi Jeff,
you’re in luck, I did at least start the documentation and made it to the parts list.
https://docs.google.com/spreadsheets/d/e/2PACX-1vSD6yetFgq38F0eHj4gdnsRh9ZRYtyIlyyOOYPlpEnQVU-u465uDxSdWY4o5XRcBivyGF9Eb1wui4Iq/pubhtml
It is not final yet but this is definitely the bulk of it. The coding side should be taken care of, unless you want to explore programmatic ways to generate GCode. And the electronics is not too hard if you take it step by step and test in between, though this version will be documented for soldering and not the easy undo/redo dupont connectors.
I hope you do build one, I’ve had tons of fun with mine :).
Amazing! Thank you so much. I’m stoked to tinker with the build, I have some ideas for how I want to rig it up. And my go to modeling and drafting software is Rhino so I may play around with Grasshopper to generate some interesting GCode. Once I get around to the full build I’ll be sure to follow up! Thanks again Ben!!
Hi Ben,
I’m trying to pick a DIY drawing robot / vertical plotter to build, and I’ve been going back and forth between your Gondola PlottyBot and the Makelangelo. Your approach won me over.
Even the first version feels more modern and maker-friendly to me: Raspberry Pi control, a web interface, sensible build logic, printable parts. It reads like a project I can actually understand and modify, not just a kit I assemble and hope works.
I noticed you mentioned a second version with possible improvements. If you have any rough notes, sketches, or lessons learned about V2 that aren’t published yet, I’d be really grateful to see them before I start — especially around mechanics, the gondola, belt tensioning, calibration, electronics, and any software changes. Even messy notes would help.
Your documentation is already some of the best I’ve found for this kind of project, so anything extra on the newer version would help me avoid mistakes and start in the right direction.
Thanks for publishing this — it’s genuinely inspiring
Hey Santry,
well the new version is significantly different than the previous one. These gondola ones are fairly easy to make really. There’s barely anything mechanical at all, the gondola doesn’t have much to it, belt tensioning is as easy as adding weights until they’re straight, calibration is nothing but measuring the distance between the motors. Electronics and the software have changed, although I did make the later backward compatible.
Since I did take a bunch of pictures last year when I posted this, how about I try to put an actual documentation together and you can be the first one to use it? I would hope to have you review it thoroughly as you build, so we can refine it. I can’t promise anything because time is tight, but let me see what I can do in the next few days.
Do you have any of the parts yet?
That’d be great — I’m in. Happy to build it straight from your documentation and give you honest feedback along the way, so you know the instructions actually make sense to another maker and not just to you. That’s really the point of a good build guide anyway, so I’m glad to be the guinea pig.
I haven’t bought anything specifically for this yet, but I’m not starting from scratch either. I’ve got a few stepper motors left over from other builds, some belts, odds and ends of electronics, and a 3D printer. Flashing microcontrollers is familiar territory too, so the firmware side doesn’t worry me.
What does the parts list look like on the new version? If you can point me at the motors, the board, and whatever specific hardware you ended up going with, I can start sourcing the gaps while you work on the docs
Hey Santry,
It’s not complete yet, but I’ve made some good progress here:
https://ben.akrin.com/gondola-plottybot-v2/
Hey Ben,
That’s great news, I’m really happy to see this. At first glance, the V2 page looks clear and understandable.
I’ll start printing the parts and hopefully get the missing electronics from the store soon. I’ll leave comments on the instruction page as I go, unless you think there’s a better place for build notes and questions.
Thanks a lot!
Hi Ben,
My machine is working. I don’t know how to draw everything yet. I’m still learning.
Can you tell me what you used to draw the child’s face? The curved line.
I used DrawingBot v3 for this one. They have a free version but I eventually caved and bought the full one, which is worth every penny. It’s very well made and has a whole lot of line algorithms to play with. But do look around, part of the fun is to find random programs online, get them working and combine them.
So glad your machine is working 🙂