PHP file upload to a Google storage bucket

Download

bucket_upload_1.0.php.gz

Google setup & use

1- Create a storage bucket for the script to upload into


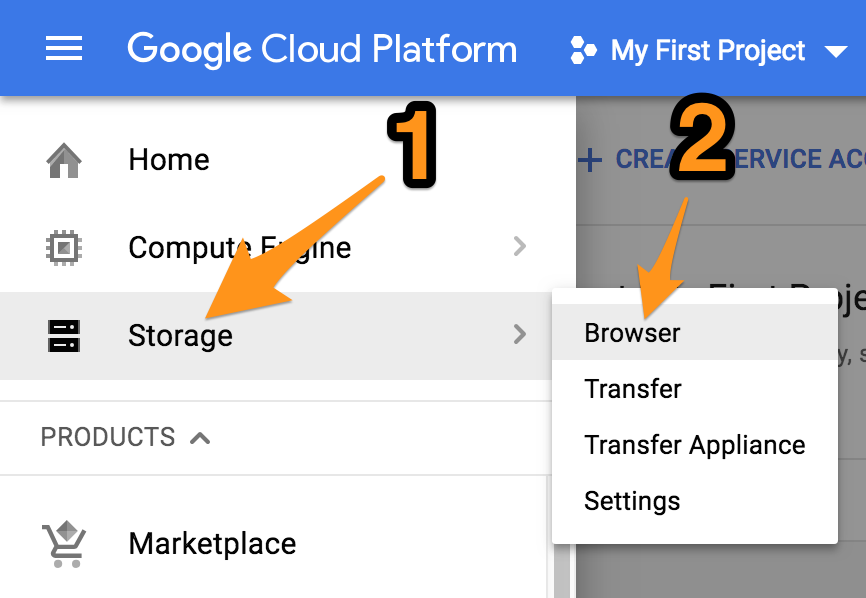
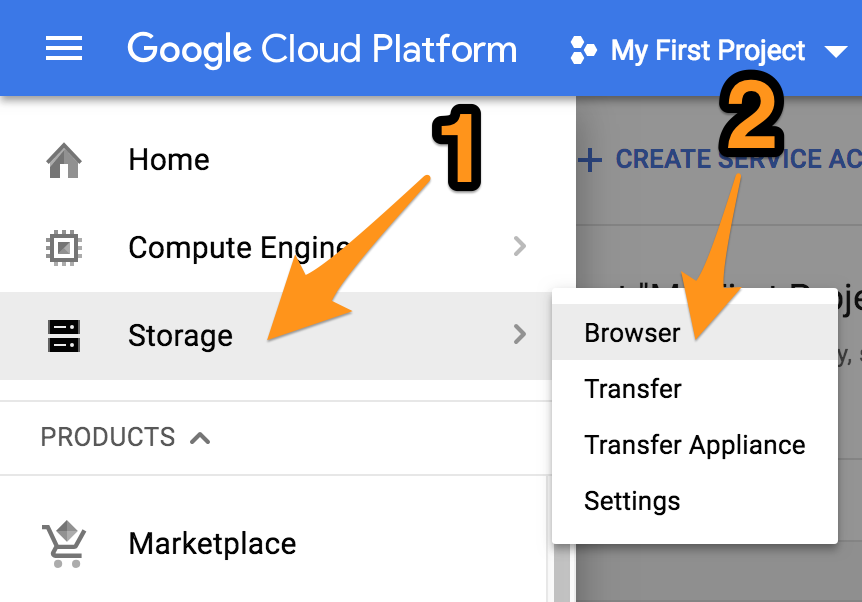
Go to the Google Cloud Console, click on “Storage”, “Browser”.
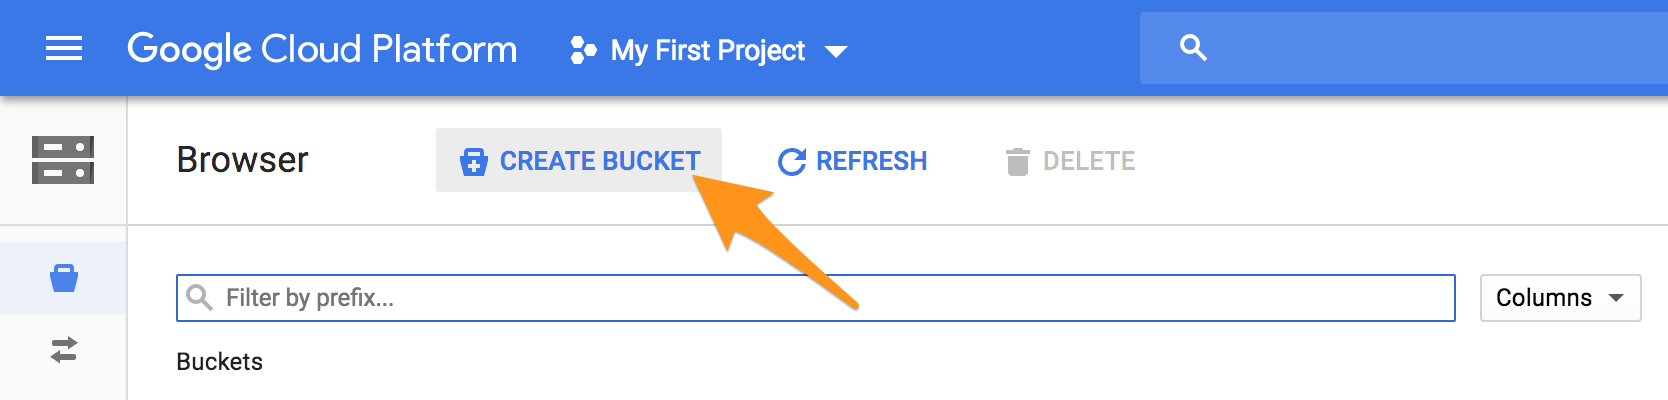
 

“Create Bucket”


Give it a name and click “Create”.


2- Create a service account for the script

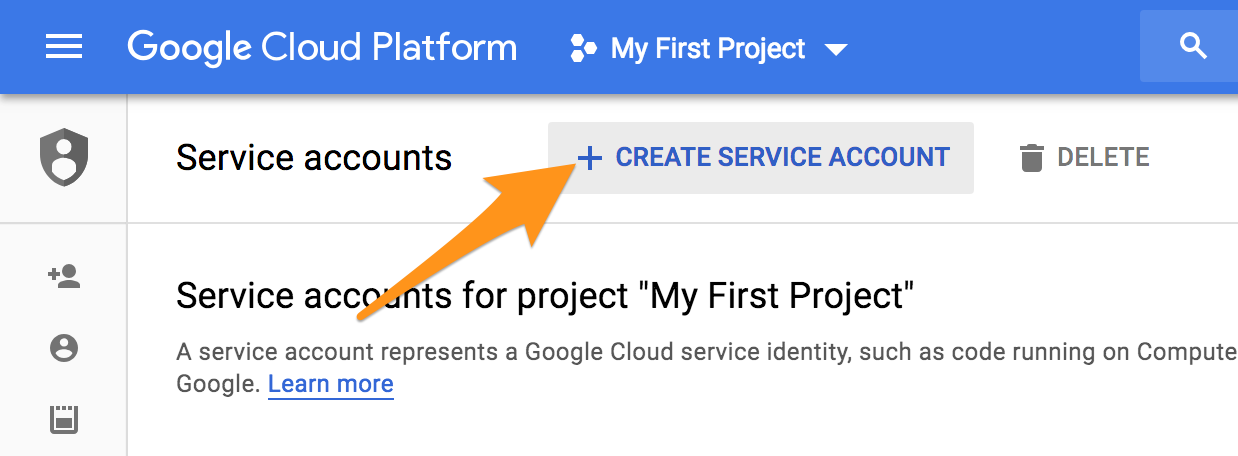
Expand the “IAM & admin” section, click on “Service accounts”.


Click “Create Service Account”.


Give it a name, check “Furnish a new private key”, JSON, and click “Save”.


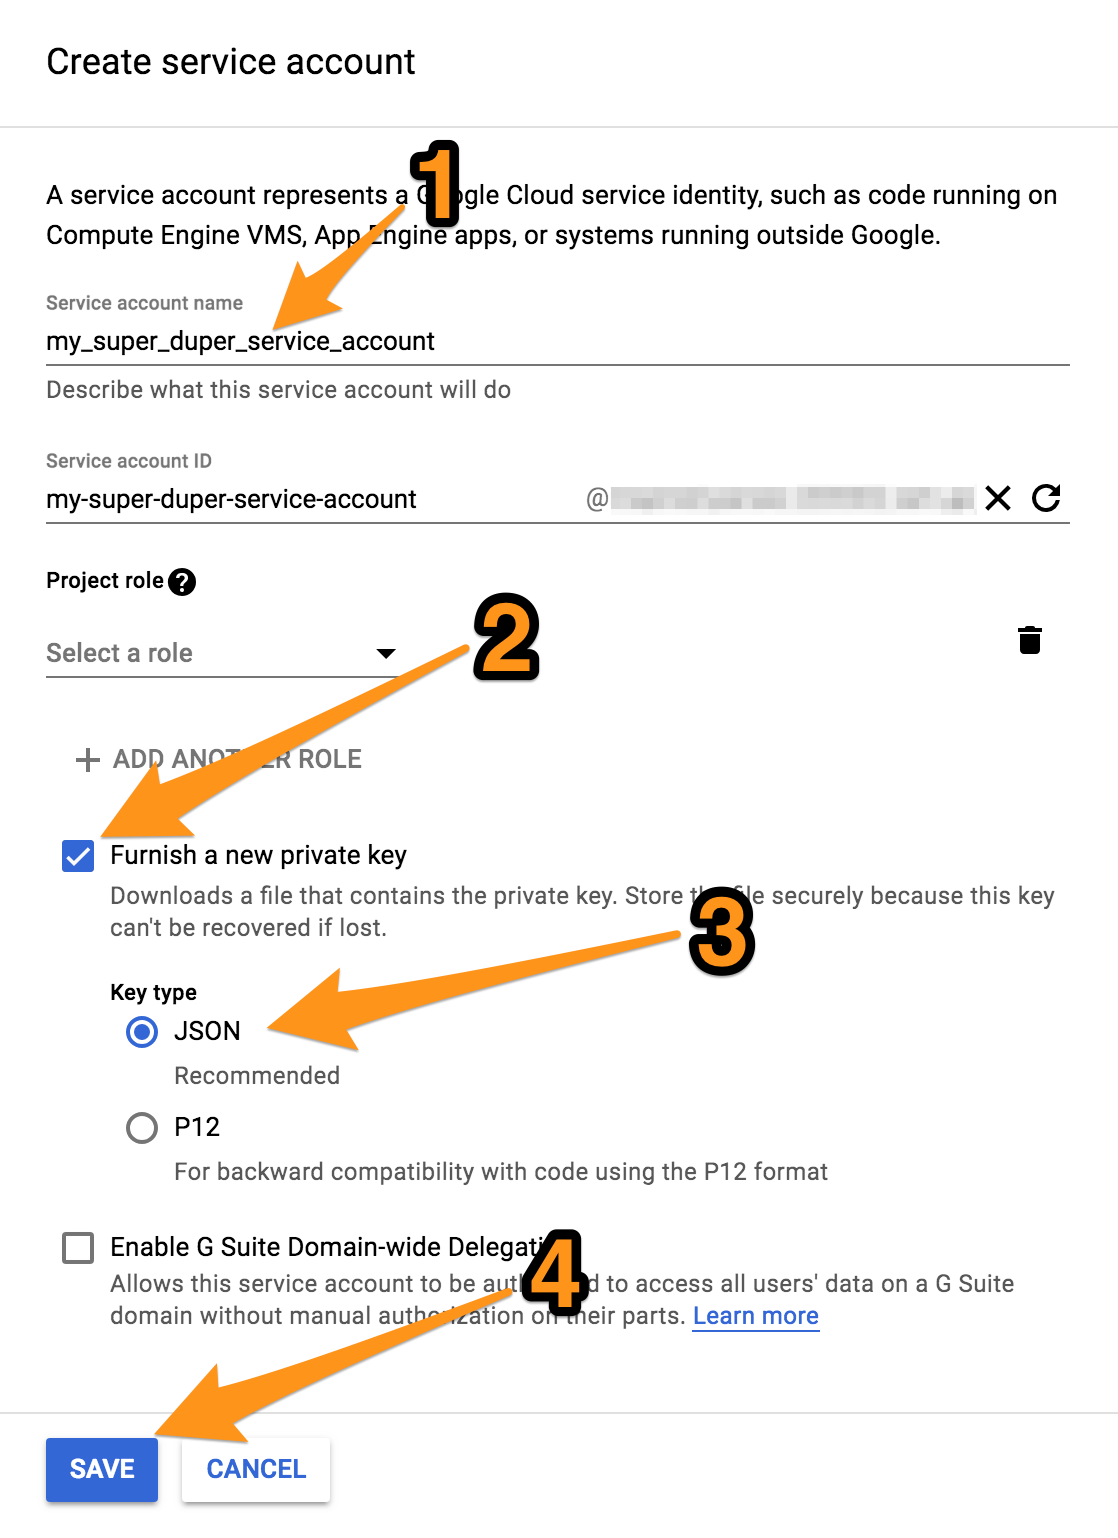
Save the JSON credentials file which you are prompted to download into a safe location.

3- Grant “Object Creator” permissions on the bucket to the service account

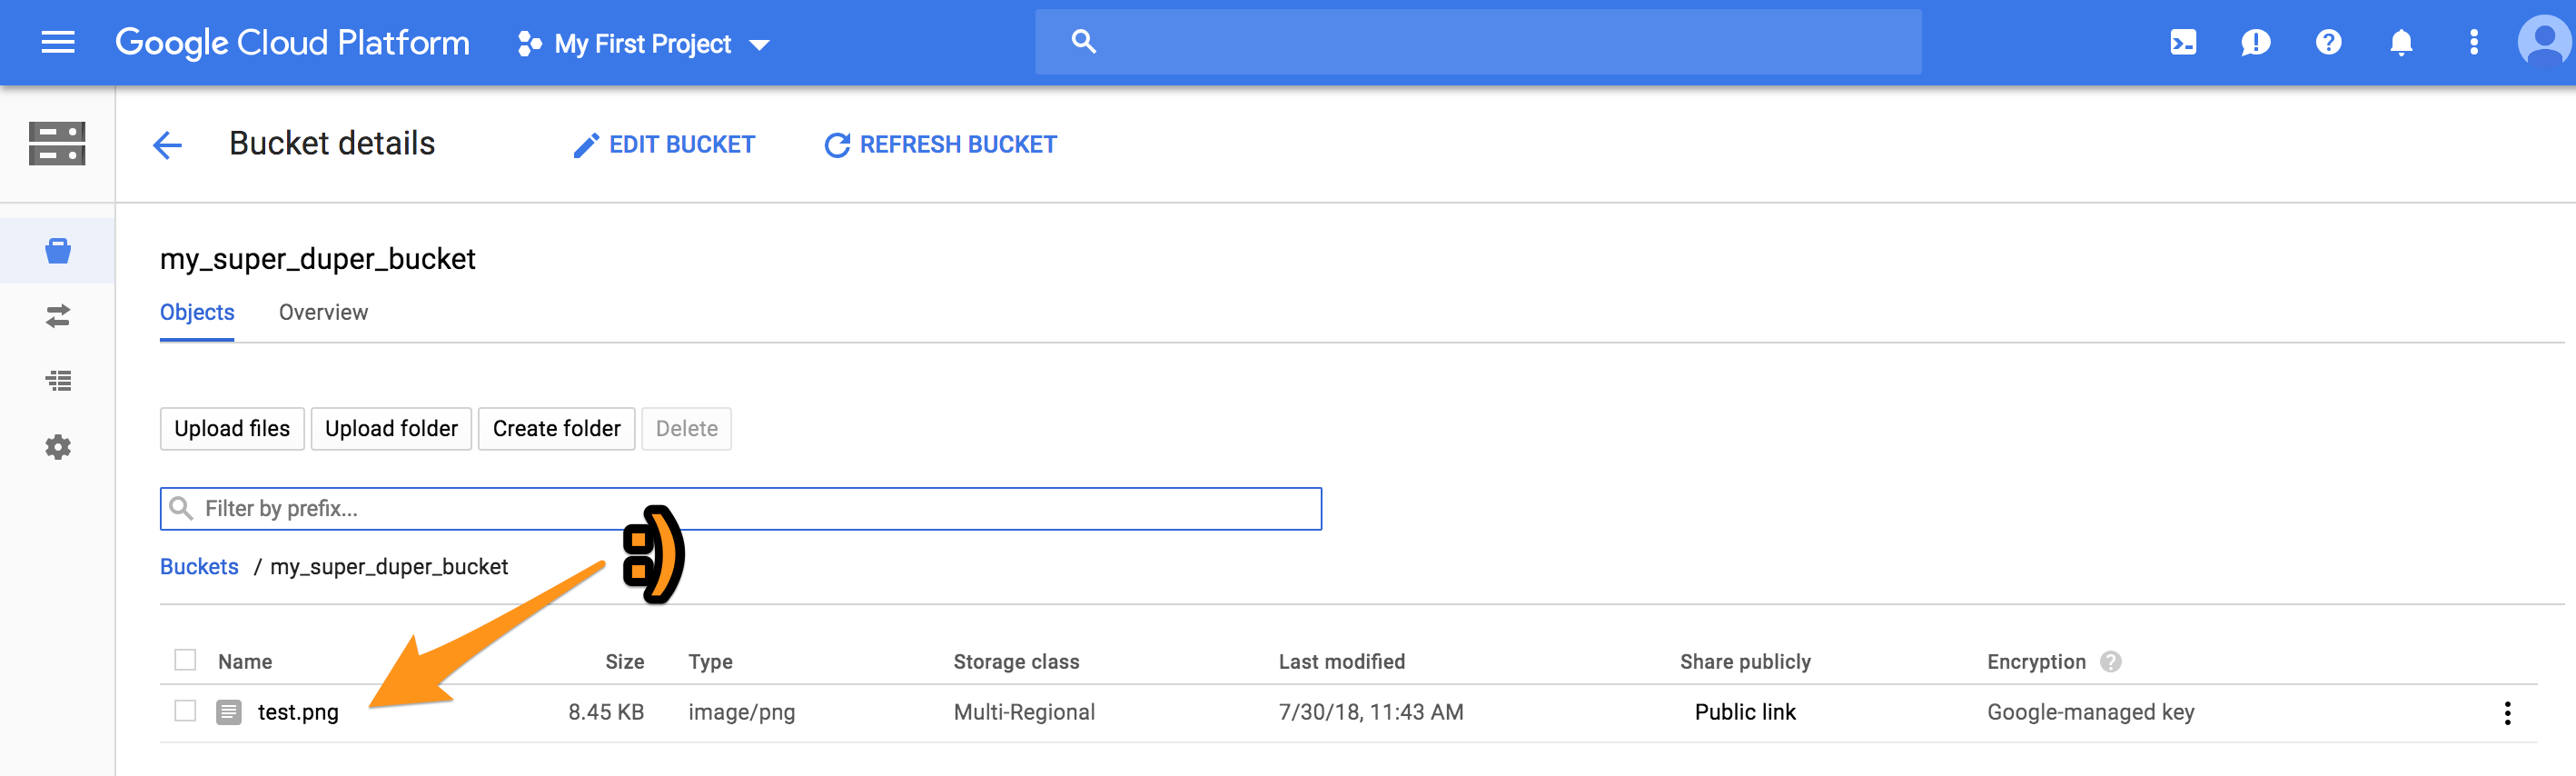
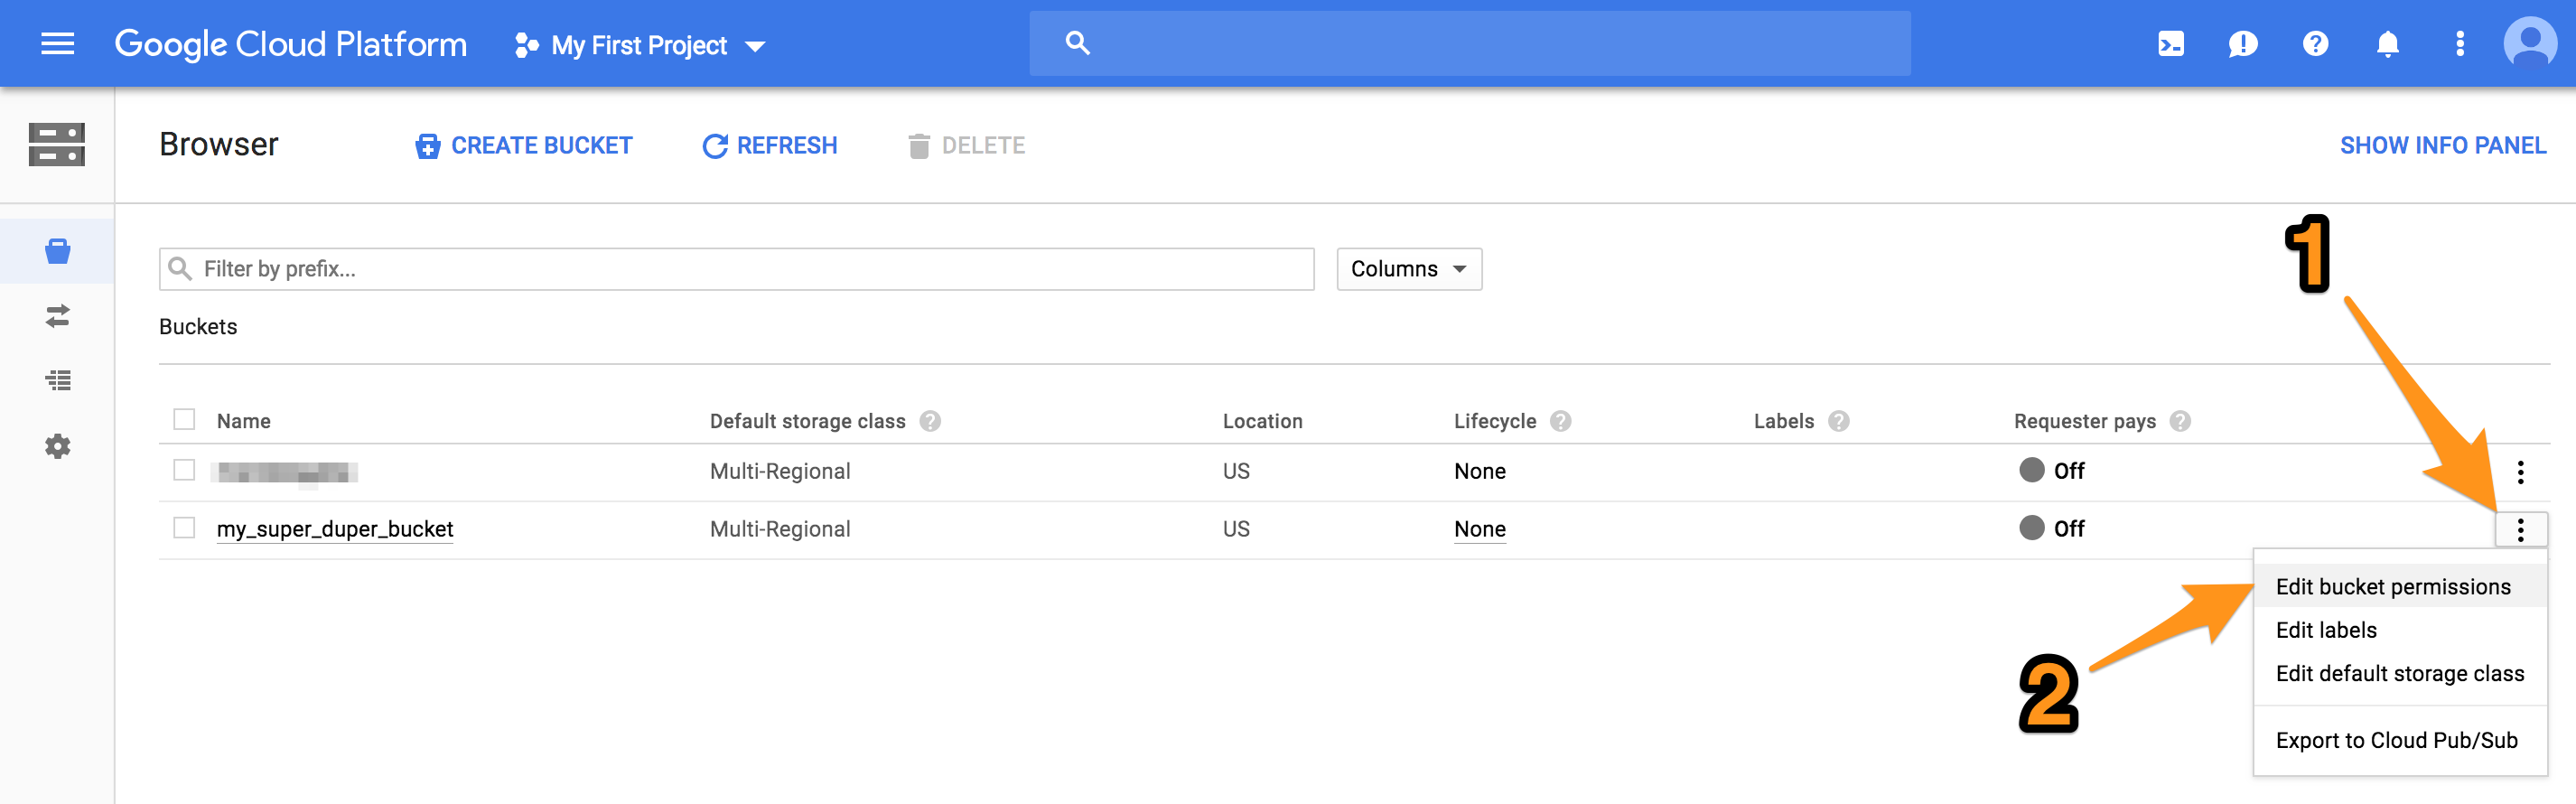
Go back to the storage bucket you created


Edit its permissions


The JSON credentials file you just downloaded contains the email for the service account you created, copy it.


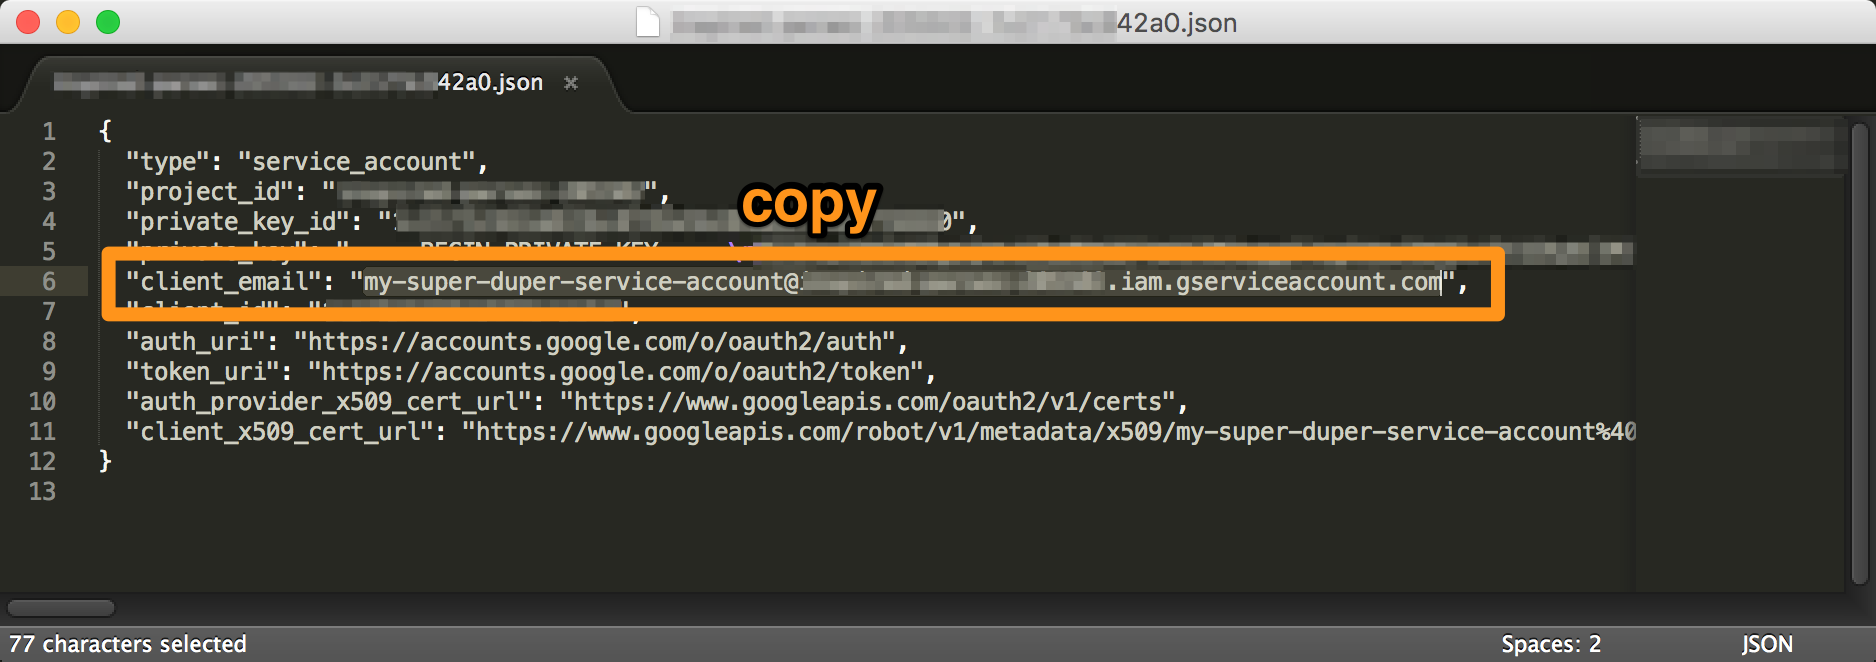
And paste it into the “Add members” field, select the permission to be “Storage Object Creator”. This service account doesn’t need permissions for anything else than dumping files in there. Not even viewing them.


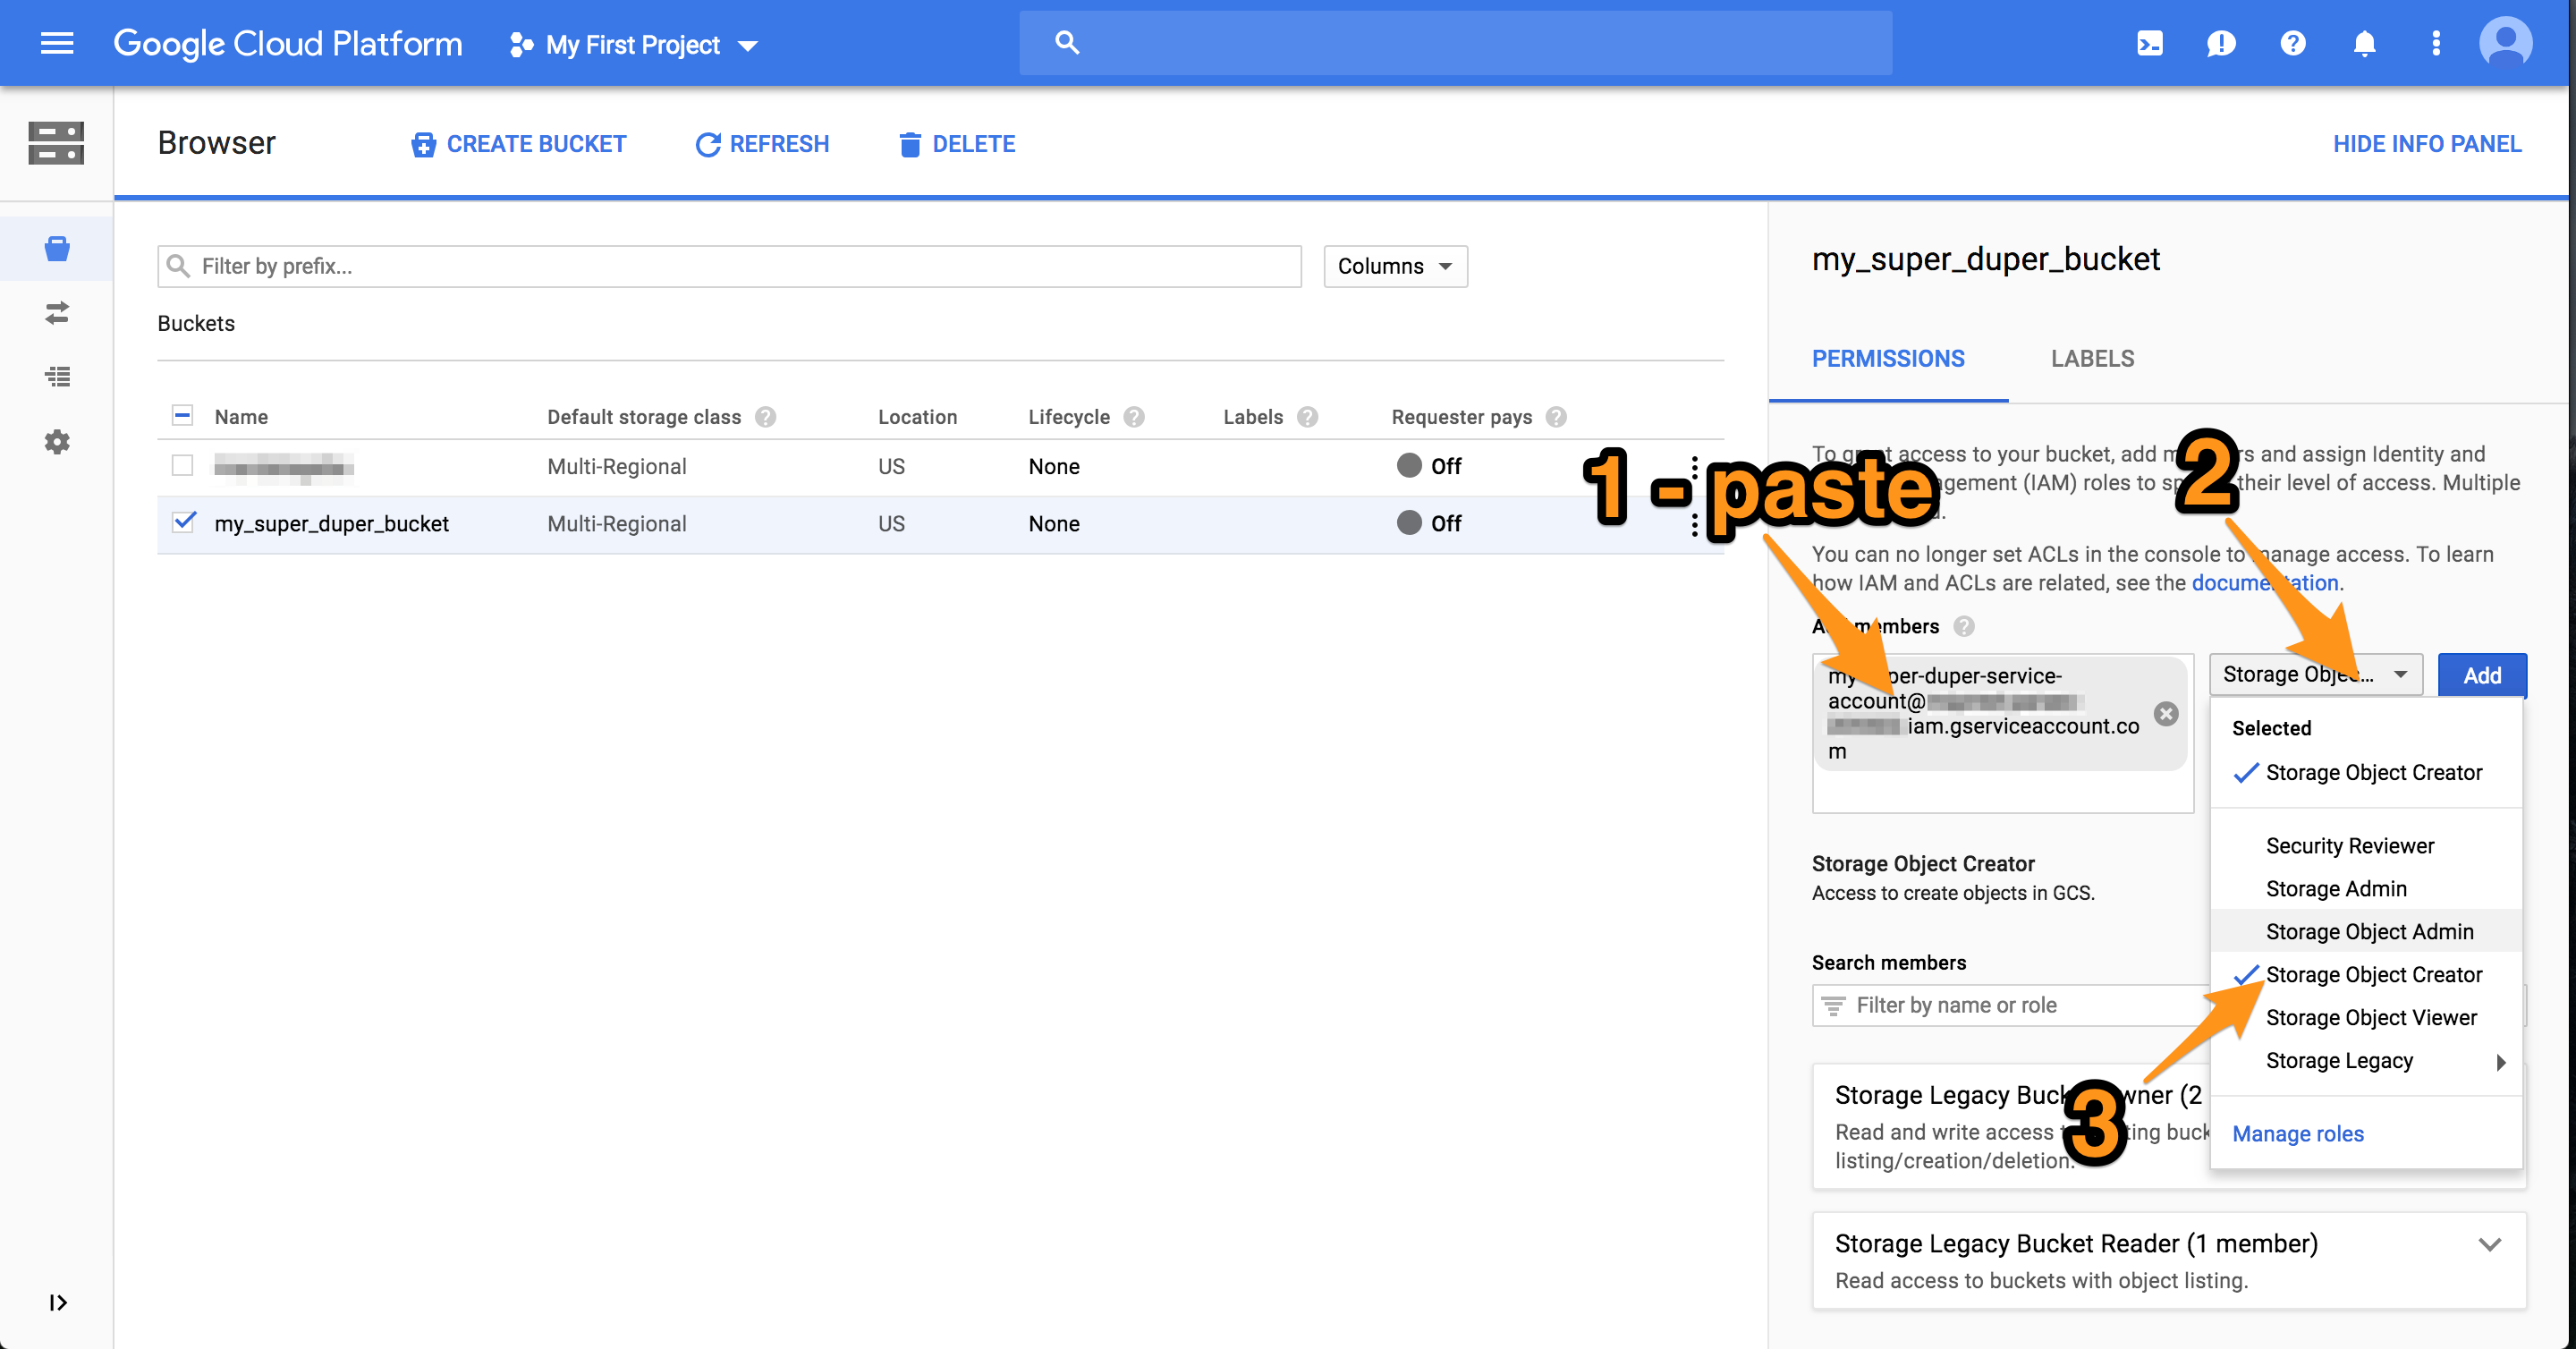
Optional: if you want the files uploaded by the script to be publicly viewable, add the permission “Storage Object Viewer” to the user “allUsers”. Accounts are all referred to by email in Google land, but there exist special keywords such as “allUsers”.

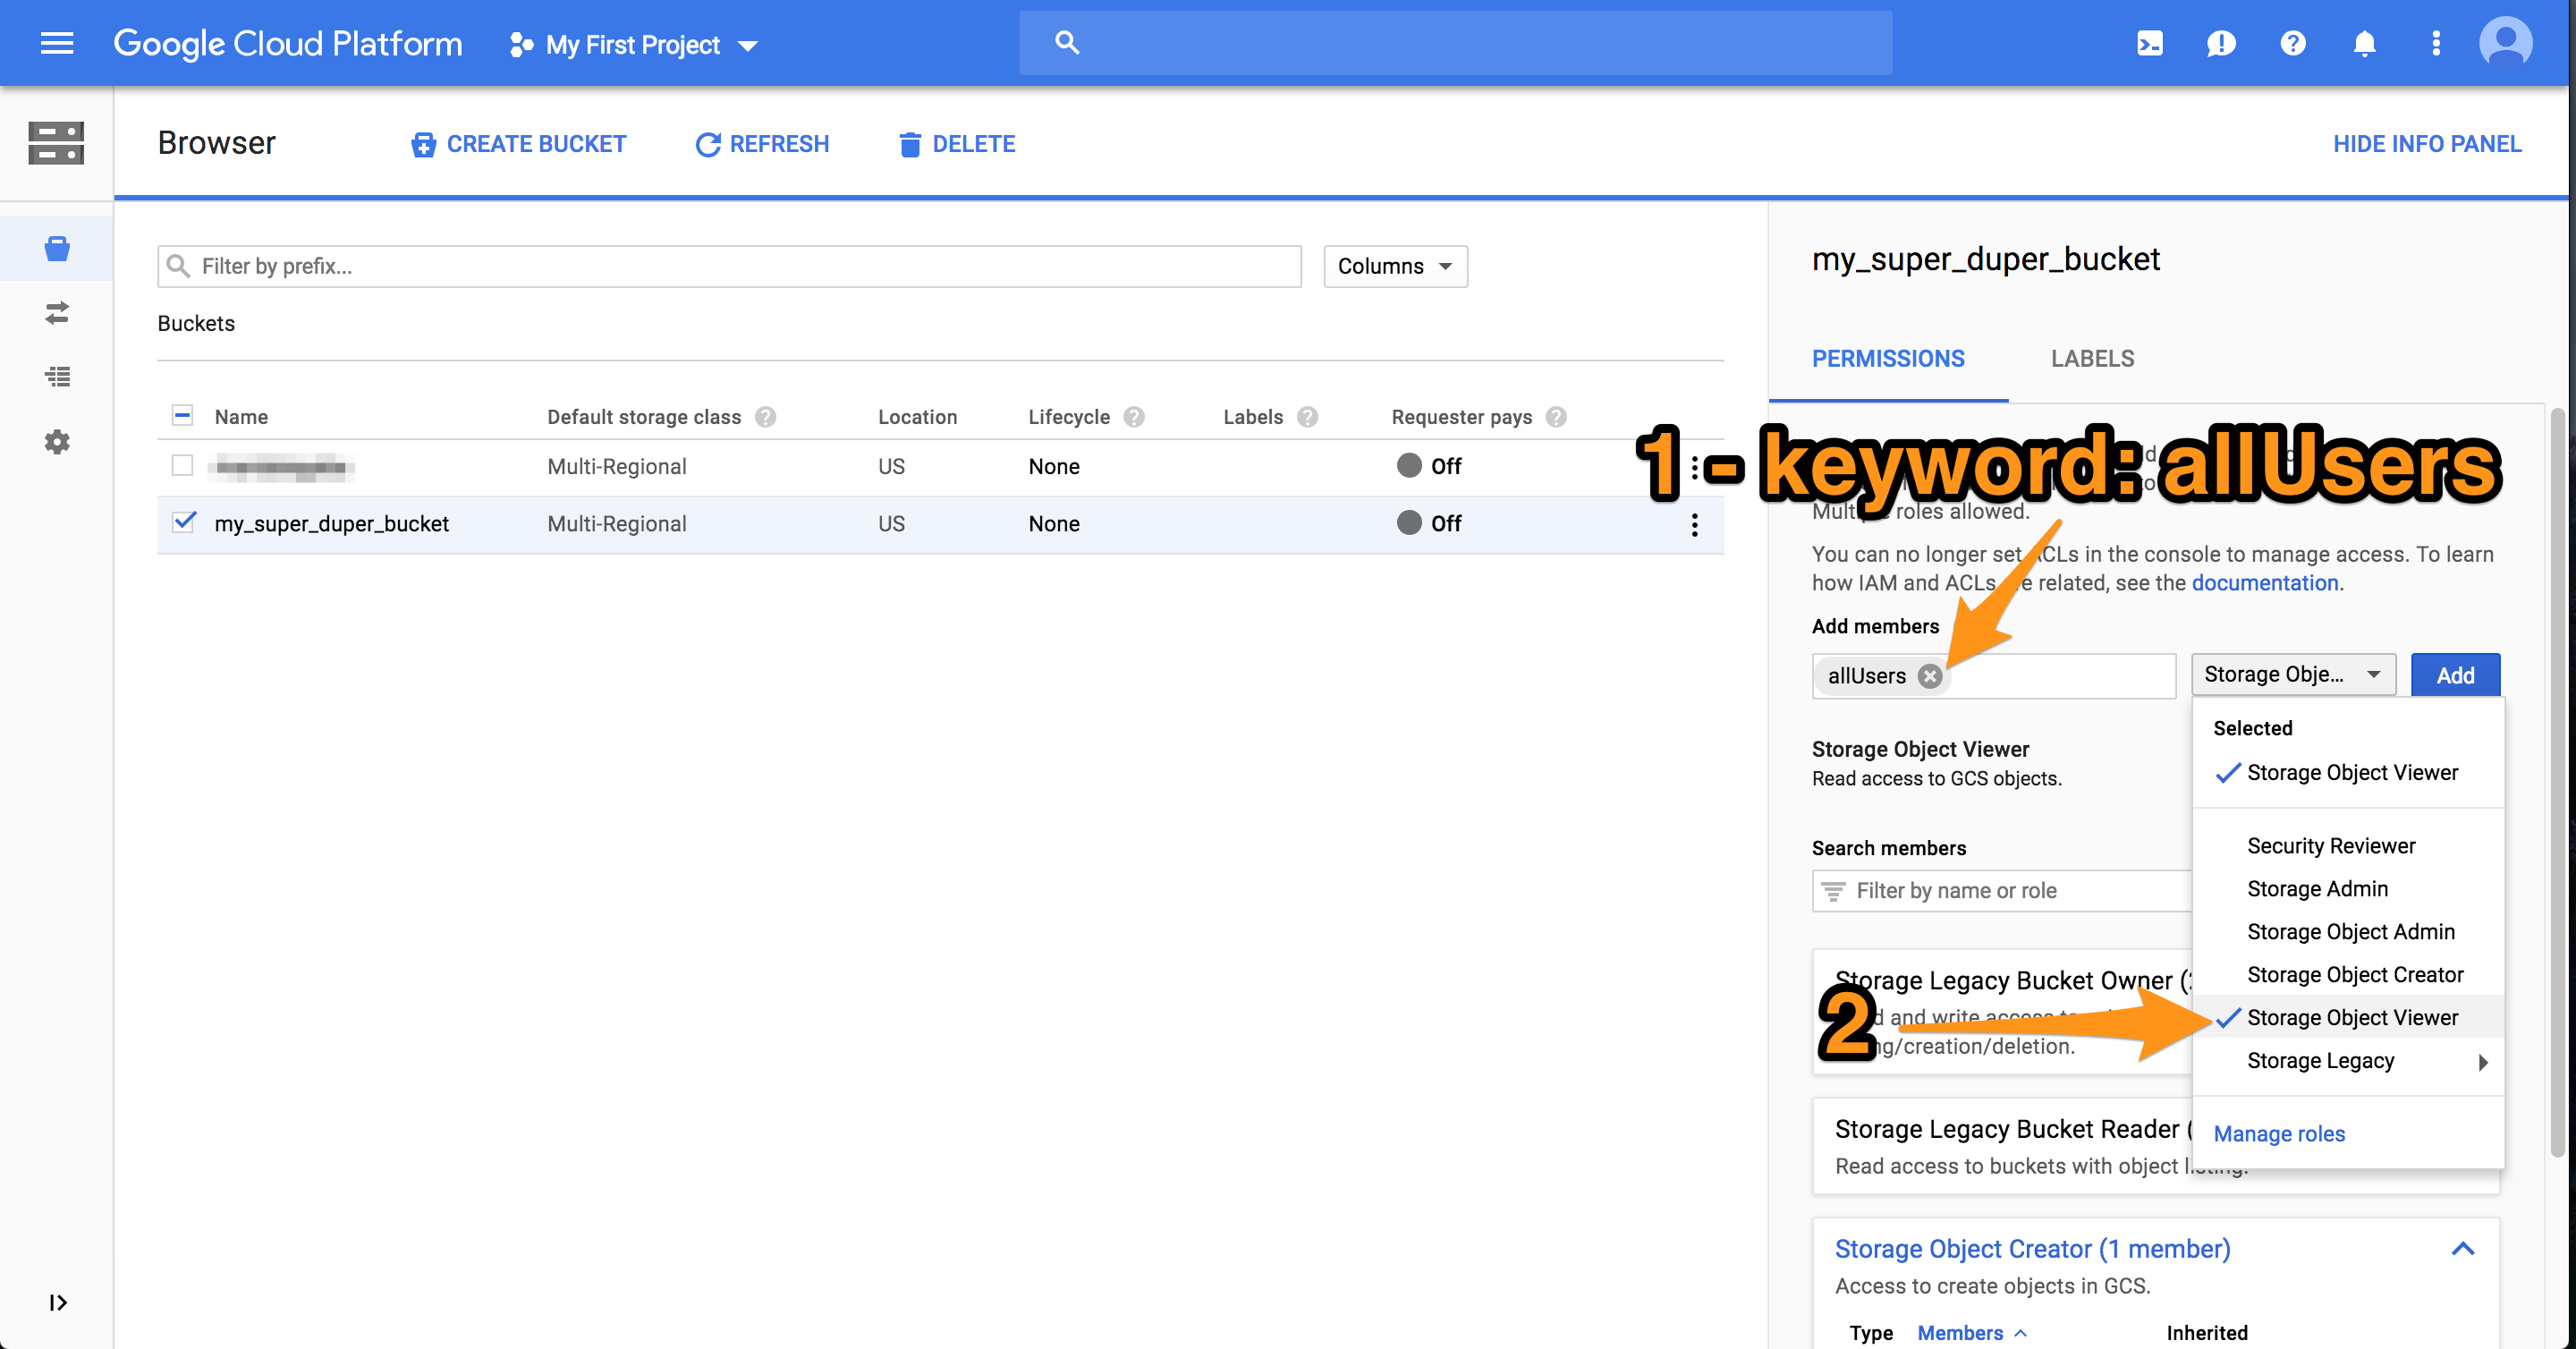
Done with the Google setup 🙂

4- Running the script

If you haven’t already, download the script at the top of this page. Decompress it and edit the config at the top.

$credentials_file_path is the full path to the JSON credentials file you got from Google when you created the service account. It should be a secure location.

$destination_bucket_name is the name of the bucket you created

$access_token_cache_file_path is a location where Google’s OAuth tokens are cached, it too should be a secure location.

Run the script with only 1 argument being the file you want to upload. The script can also be included and used outside of CLI, in that case simply call the upload( $filename ) function.

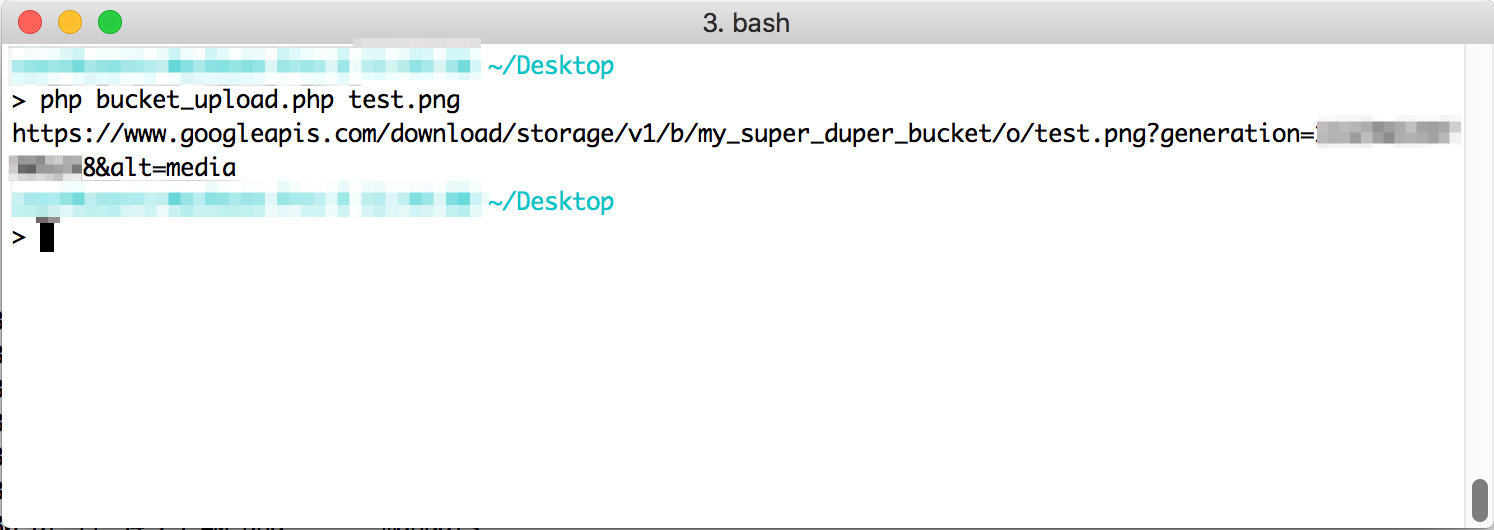
The script returns the URL to the file in the bucket.

Voilà:

A small milestone

The millionth penstroke on Mandalagaba since the code rewrite last February

There’s more data I’d like to pull out of this. For example the average length of a stroke, average time, how many human lives where spent drawing mandalas, et cetera :).

An HTML5 canvas Flood Fill that doesn’t kill the browser

I took the longest time implementing the fill tool  on Mandalagaba. How hard could it be? Recurse through pixels looking for a color and update them to a new color.

While this method certainly works and is easy to implement, it is also extremely slow. Slow in a way that hangs the browser, yielding infamous messages from the browser.

Here we’ll take a look at various Javascript flood fill implementations along with their drawbacks. Jump to #4 if you are only interested in the best one.

2018-10-04 – edit – added fill algorithm #5 which proposes an alternate approach to filling pixel by pixel. Depending on your project it may or may not serve your needs better.

In all cases, the code is available in the example iframe, look for the function flood_fill.

1. Simple Recursive

Not much to explain here, we simply recursively call the function on adjacent pixels when they match the color we are trying to fill over.

Click to change color / pop-out link

It’s reasonably fast but the problem with this one is that any fill area slightly large yields too much recursion which breaks subsequent JS. This Canvas box is 200x200px and at 300x300px, Firefox complained about:It’s easy to see how this implementation will not satisfy a reasonably featured paint program. Even if your browser let you stack more function on the heap, I would bet it would lead to slowness.

2. Iterative

We simply take the previous idea of looking at adjacent pixels and filling them, and make it iterative instead so the function calls don’t get stacked to a ceiling.

Click to change color / pop-out link

The problem with this is is that is is sloooow. So slow it stalls browser. Most of time is spent having to keep track of pixels_stack. Recursion doesn’t have that need but as we’ve seen, it has other issues.

3. Recursive-Iterative (AKA catch-your-breath iterative)

This is a twist on #2 which every so often, recurses on itself via a setTimeout to let the browser catch it breath a little. It also yields a cool visual effect.

Click to change color / pop-out link

I really like the visual effect, and it makes the slowness tolerable. But the issue is that Mandalagaba has a network engine and allows for re-rendering of one’s work. So synchronization is a big deal, and you know what makes synchronization easy? Not having to worry about it.

So as long as I can help it, my life is a lot easier if the operations the users can perform are atomic. Operations need to be able to be processed one after the other counting on the fact that the ones that came before have completed.

The first 2 solutions are atomic but suck; this 3rd one, however cool it may be, isn’t.

4. The Holy Grail

I’m not sure where this algorithm originated from, but I’ve gotten to know it on this web page which explains it very well (with GIFs!). It is iterative and goes about finding pixels to fill in a much smarter way.

Click to change color / pop-out link

That’s it, no drawback here 🙂 I’ve tested it on large canvasses and this is what is implemented on Mandalagaba. Now of course, in a real application there is a ton more complexity dealing with smoothing edges and blending alpha. I only wanted to expose boiled down versions of these algorithms so they are easier to wrap your mind around.

5. The Holier Grail?

While #4 is fastest algorithm for filling pixel by pixel, I found myself in the need to have a fill operation in for form of a path which is filled with the native HTML5 canvas capabilities. This algorithm is a bit different from all the other ones in that it doesn’t go through every pixel and fills it. What it does is pathfinding to draw the outline of the shape of be filled, and then simply calls the native canvas fill() function. It does come with certain drawbacks and so I wouldn’t recommend it unless you specifically need this sort of approach.

Click to change color / pop-out link

Feel free to ask questions in the comments.