Full disclaimer:
The subject matter of this post is controversial as it discusses extracting computing resources from the visitors of a website. There are a lot of discussions at the moment centered around web-browser based crypto currency mining. Most paint a deplorable picture of the practice; please keep in mind that there are very desirable paths alongside which these practices can develop. I am not elaborating on these arguments here, I am only describing a method to harness the resources.
Premise
Web browsers are becoming quite powerful for code execution. Between Javascript’s increase in capability, WebAssembly, access to GPU & threading, a web browser today is almost as desirable for computing as the machine it’s running on. Ever since the rise of web-based crypto currency miners, I’ve been thinking of harnessing all that computing power as a single entity: a super computer made of your visitor’s web browsers.
Just like a regular computer cluster, the nodes all participate in a coordinated fashion to solving a single problem. Unlike a regular computer cluster, the nodes are very ephemeral (as website visitors come and go) and can’t talk to each other (no cross site requests).
Here’s a demo of what I came up with:
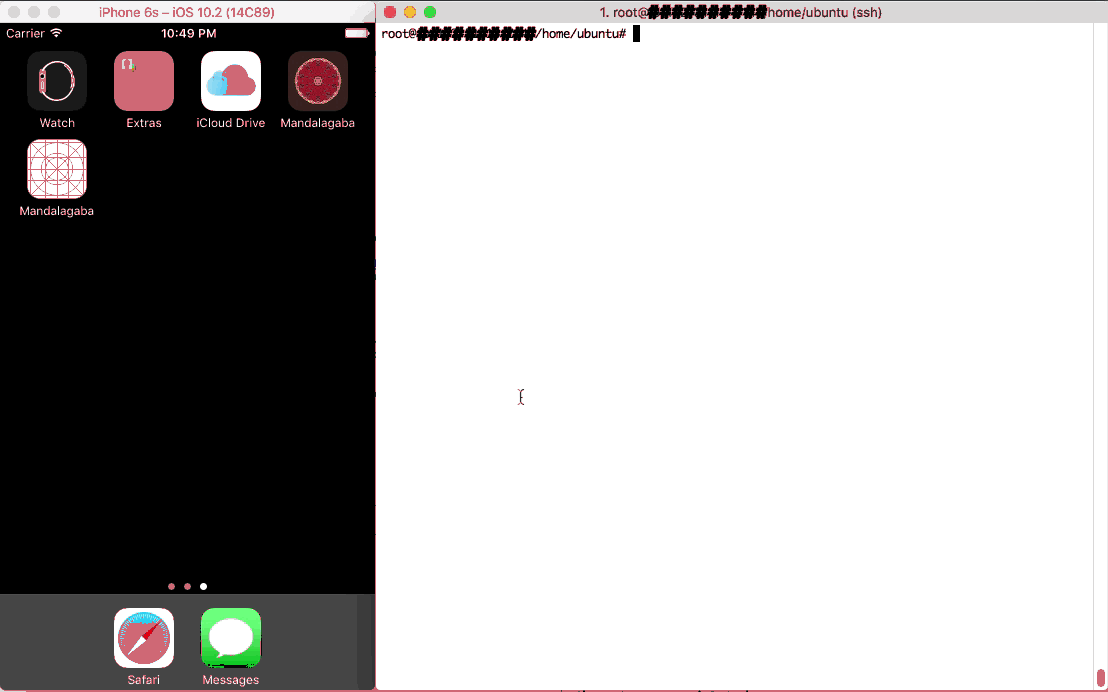
Right: the super computer control server
Left: one of the web clients contributing to the super computer simply by being connected to a website (& CPU metrics)
[mejsvideo mp4=”http://ben.akrin.com/videos/transient_node_javascript_supercomputer.mov.mp4″ ogg=”http://ben.akrin.com/videos/transient_node_javascript_supercomputer.mov.ogv” webm=”http://ben.akrin.com/videos/transient_node_javascript_supercomputer.mov.webm” poster=”http://ben.akrin.com/videos/transient_node_javascript_supercomputer.mov.jpg” width=”640″ height=”360″]
The problem being solved here is the hashing of 380,204,032 string permutations to find the reverse of a given hash. Problem parameters were chosen to make heavy processing quick for the clients.
Implementation & code samples
At the core of the idea is the websocket technology. It creates a persistent connection between a server and all of the nodes (the visitors of your website). This connection can be used to orchestrate actions between the nodes so that they can act as a concerted entity. From delivering the code to passing messages for coordination, websockets are what make everything possible.
Having a websocket connection to clients dramatically changes what you can do with web clients. They are fully addressable for the duration of their visit. They may show up on a website and be served some pre-established javascript; but with websockets, any javascript can materialize at any time.
Right: the super computer control server
Left: a web client being given an instruction on the fly
Slightly tangential but still worth considering, using a web view app, Javascript can pass execution to the app itself. This means code showing up on the websocket can escape the webview bubble and go into app land.
Right: the super computer control server
Left: a web app being given an instruction which percolates to the app layer
Now this is nothing new in a lot of ways; apps can be made to get instructions from C&Cs, and websites can get Javascript after the initial page load from dynamic sources. The websocket technique though is as dynamic as it gets (no Ajax pull), it is portable to many browsers and many devices, it is hard to catch looking at a web inspector; lastly, it executes with full access to the context it materialized in.
So we’ve established that websockets can be used to dynamically deliver code to be ran by the nodes. It can also be used for message passing and the overall orchestration of distributing the problem to be solved.
Crackzor.js
6 years ago I wrote a ditributed OpenMPI based password cracker: crackzor. Password cracking is a good distributed problem to solve because it’s a fairly simple problem: run through all the character permutations. The fact that it exhausts a known space also means benchmarking is easy. So to put the idea of a transient node javascript super computer in practice, I rewrote crackzor in JS instead of C, and for websockets instead of OpenMPI.
Every distributed problem is different and crackzor itself isn’t a magic way to distribute any problem to be solved. The magic of crackzor is its ability, given a space of character permutations, to divide it up in chunks which can be processed by the nodes. Given the problem, a start iteration and end iteration, a node can get to work without having to be provided the permutations themselves, thus removing the bandwidth bottleneck.
The first challenge: maximizing usage of the node’s CPU.
Javascript runs single threaded by default, so when the websocket sends code to be ran by a client, by default, the code running as fast as it can will only be able to fill one core of the CPU. A large majority of machines today have many more cores available. So we have to figure out how to use them or our super computer is going to loose a large portion of its processing power right off the bat.
Web workers to the rescue. With HTML5, it’s easy as pie to thread code. The one trick with the code we want to thread is that it can’t be gotten from a file as the web worker documentation suggests. That’s because our code doesn’t come from a static javascript file remember? It shows up out the the blue on the websocket, so it came from the network and is now in memory somewhere => not a file we can refer to.
The solution is to wrap it in a blob as such
[code language=”js”]var worker_code = ‘alert( "this code is threaded on the nodes" );’
window.URL = window.URL || window.webkitURL;
var blob;
try {
blob = new Blob([worker_code], {type: ‘application/javascript’});
} catch (e) {
window.BlobBuilder = window.BlobBuilder || window.WebKitBlobBuilder || window.MozBlobBuilder;
blob = new BlobBuilder();
blob.append(worker_code);
blob = blob.getBlob();
}
workers.push( new Worker(URL.createObjectURL(blob)) ) ;[/code]
Here you’ll notice we have our first layer of encapsulation. The code relevant to the problem we are solving is in the variable worker_code, the rest of the javascript only threads it.
Having distributed amongst a node’s cores, we now look at
the second challenge: distributing between the nodes
This work is obviously up to the websocket server along with subsequent coordination. Without going into too much details, the websocket server keeps track of all the nodes as they come and go, it also keeps track of which ones are working or not, allocates new chunks of the problem to nodes as they become available.
A trick of the websocket server is that it is running at all times to handle node connections. Super computer problems however may change from one day to the next. To address that, I give it a function which reads a file and evals its code; the function is summoned by a process signal. As such:
[code lang=”js”]function eval_code_from_file() {
if( !file_exists("/tmp/code") ) {
console.log( "error: file /tmp/code does not exist" ) ;
} else {
var code = read_file( "/tmp/code" ) ;
code = code.toString() ;
eval( code ) ;
}
}
process.on(‘SIGUSR1’, eval_code_from_file.bind() );[/code]
With this puppy in place, the next time I “kill -USR1 websocket_server_PID”, it will be imbued with new code that did not exist when it started. Does this sound familiar? Yup, javascript is super interesting in the ability it gives you to run arbitrary code at any time with full access to the established context.
Thus arrive the 2nd and 3rd layers of encapsulation, the code which will be distributed to the nodes is in a file which is to be evaled on the websocket server side and sent over the websocket to the clients.
The actual distribution to the nodes is simple, have them connect with a callback to eval code. Something like that:
Client:
[code lang=”js”]var websocket_client=io.connect("http://websocket_server.domain.com") ;
websocket_client.on( "eval_callback",function(data){data=atob(data),eval(data)}.bind() ) ;[/code]
Server:
[code land=”js”]client_socket.emit( "eval_callback", new Buffer("alert(‘this code will run on the client’);").toString("base64") ) ;[/code]
Recapping where we are
So…
- all the transient nodes (web browser of website visitors) attach to a websocket server
- the websocket server receives SIGUSR1 which signals it to execute new code it gets from a file
- this new code gives the websocket server a packaged problem to be solved by the nodes
- this new code also instructs how the websocket server will distribute and coordinate the nodes
- once the packaged problem to be solved shows up on a node, it is evaled and it contains threading to maximize CPU usage.
And there you have it,
all the pieces you need to make a super computer from your web traffic. I’m choosing not to publish the full code of my implementation for reasons of readability, security and complexity but I can go into more details if asked.
The same way that peer-to-peer protocols made any data available anywhere any time, could this do the same for computing power? Mind=blown, and your CPU along with it.
More tips
- When choosing a chunk size for clients to work on, it’s important to not pick too big a size. The nodes are very transient and a big chunk size means the chunk’s processing is more likely to be interrupted. Most web browsers also offer to kill poorly coded javascript running berserk and so a small chunk size taking a few seconds and letting the machine catch it’s breath briefly will make it less likely that a browser will notify a user that a script needs to be killed.

- When encapsulating out the wazoo, keep in mind that Internet Explorer (Edge or whatever it’s called today) doesn’t support backticks.
- Syntax highlighting will be confused by the strings in strings in strings of encapsulation, it helps to just turn it off.
- Javascript md5 implementation here: https://gist.github.com/josedaniel/951664
- I found it necessary to keep track of an average time to solving a chunk so that I may exclude the nodes which are taking too long and polluting the good performance of the supercomputer.